There’s no doubt about it, fiberglass pools definitely have an advantage over their old-fashioned concrete counterparts. Although fiberglass pools can seem flimsy compared to concrete, they’re actually very durable and easy to maintain. This makes fiberglass pools more cost-effective, as there’s less need for chemicals and scrubbing. But even though fiberglass pools are durable, they can occasionally develop some cracks and bulges. Here’s what you need to know about fiberglass pool repair.
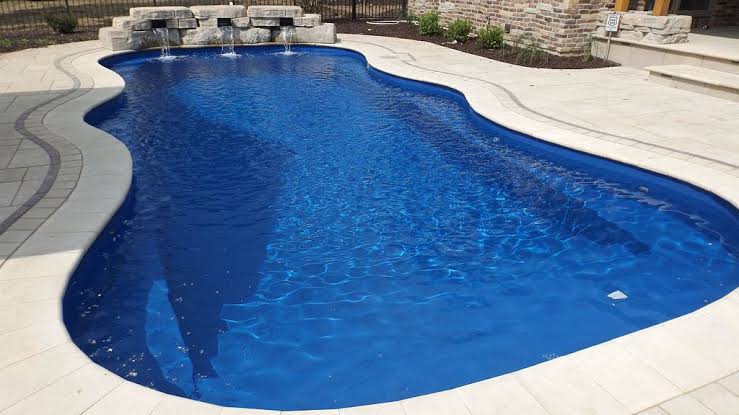
Fiberglass Pool Pool Installation
When fiberglass pools first came on the market, fiberglass technology wasn’t as advanced as it is today. They used to be poorly constructed and designed and when installing them, concrete would be poured up to the edge of the pool and then covered with fiberglass, leaving the top edge of the pool exposed, which was unsightly. However, fiberglass pools have come a long way since then and modern fiberglass pools are elegant and stylish, fitting effortlessly into any home setting, whether classic or modern.
However, although pool installation has come a long way, fiberglass pools are still subject to everyday wear and tear and require basic maintenance to ensure they stay in top condition and don’t end up devaluing your property. But even with proper maintenance, being exposed to harsh chemicals and other elements can cause havoc to your pool and can lead to cracks and bulges appearing. Follow the steps below to help repair these unsightly blemishes to your pool’s surface.
How to Fix A Hole or Crack in Your Fiberglass Pool
List of required tools:
• Electric disk sander
• Fiberglass repair kit – automotive kits can also be used
• Diamond-edged cutting wheel
Step 1 – Drain the Pool and Inspect the Extent of Damage
In order to fix a bulging or cracked fiberglass pool, the first thing you need to do is drain the pool and let it dry out so you have full access to the damaged area and so that water doesn’t get into the crack or prevent your repair from drying.
Although draining your pool is a tedious exercise, underwater fiberglass pool repair isn’t recommended as it can prolong the repair process and cause the cracks to reappear because the repair area has not been allowed to dry properly.
Once you have a clean, dry surface it’ll also be easier to inspect the area and determine the severity of the damage. Smaller cracks will require a different method of repair to larger splits in the fiberglass.
Step 2 – Sand the Damaged Area
Use an electric sander to sand down the area around the crack or bulge to remove any loose dirt and peeling paint before applying acetone to get rid of any residual dust. Don’t manually sand the area with sandpaper as it won’t produce as smooth a result as an electric sander does.
Next, mark an area of about 2 inches around the damaged area with a pen. Then replace the sanding disc with a diamond-edged cutting wheel and cut out the marked-out area to the depth of the crack so that it is completely removed.
Step 3 – Apply the Bond Coat
Next, mix the bond coat according to the instructions in the repair kit and apply it to the crack using a putty knife to fill the cutout gap so that it is in line with the pool surface and wait for it to set — it should have a tacky consistency.
If the crack is leaking water, first apply hydraulic cement before applying the bond coat.
Step 4 – Apply Polyester Putty
Before applying the polyester putty, you first need to catalyze it in order to cause a chemical reaction. You need to apply an epoxy to cause the reaction — this should be included in your repair kit. The higher the ratio of catalyst to putty, the quicker the dry time and the harder the putty will dry. Make sure it’s smooth by using a putty knife or scraper to level it. Once it has dried, use the electric sander to smooth the area and wipe it down with some acetone to remove any residual dust.
Step 5 – Apply the Gel Coat and Fiberglass Cloth
Apply masking tape about 2 inches around the repair area and apply a gel coat with a paint roller or use an air sprayer for a more even coat. While it’s still wet, apply the fiberglass cloth and roll the area with a ribbed roller to remove any air bubbles and folds. The fiberglass cloth should cover the entire 2-inch perimeter around the repair area. Then apply another gel coat and allow it to dry before sanding it until it’s smooth and wipe away the dust again with acetone. To finish up, apply a coat of sealant and leave it to dry completely, which should take 2 to 3 days, depending on weather conditions, before refilling the pool.
Please bear in mind that when repairing cracks and bubbles it’s difficult to get a perfect color match so it’s recommended to acquire the assistance of a pool technician so that you limit the possibility of making the repair area look more unsightly than the bulge or crack was to begin with.
Alternatively, if the surface is too damaged, a technician could also advise you whether you would need to get your pool completely resurfaced with a new gel coat finish.
Maintaining Your Fiberglass Pool
Fiberglass pools are the most low maintenance and if you take care of them properly, they should last decades. They require less than half of the maintenance work required for concrete and vinyl pools because of their gel coat that makes them less porous, so it’s harder for water and chemicals to get absorbed and damage the pool surface.
Algae is also less likely to grow on the smooth surfaces of a fiber glass pool. While concrete pool owners often complain of having perpetual algae issues and murky pool water, fiberglass pools tend to stay sparkly clean with minimal maintenance.
You won’t typically need to brush a fiberglass pool as much, or add as many chemicals as you would for concrete and vinyl.
Basic maintenance of your fiberglass pool entails:
- Cleaning your pool regularly
- Checking the chemistry of the water with a pool testing chemical testing kit
- Running your pool filter and making use an automated pool vacuum
- Keeping the water level above the pool skimmer
Even though fiberglass pools require less water chemistry maintenance than other types of pools, testing and keeping your water chemistry in balance is the most important part of the maintenance process.
It’s important to do a monthly test for calcium hardness, cyanuric acid, and metals and use a good-quality test to measure the pH, chlorine, as well as total alkalinity and acid levels. Make sure to collect samples at least 18 inches below the water level on either side of the return jet.
When cleaning a fiberglass pool, always ensure you use nylon bristles so that you don’t scratch the surface of the pool and use a pool vacuum that is heavy enough to remove dirt and debris that has sunk to the bottom. Always use non-abrasive cleaners that are suited to fiberglass pools so that they don’t form hairline cracks in the surface of the gel coat or disturb the water chemistry.
Fiberglass Pool Repair Cost
The cost to get your fiberglass pool professionally resurfaced is about $6500, but it depends on the size, shape and age of your pool, as well as the finishes. Luckily for fiberglass pool owners, fiberglass pool surfaces are pretty standard, so the the price of pool repair should be less variable than with materials like gunite, for instance.
Contracting a professional pool repair company to fix small cracks and bulges also shouldn’t cost too much. For the best results when fixing your fiberglass pool, it’s always best to get a professional pool repair company to do the work rather than attempting to do it yourself.
Leave a Reply
You must be logged in to post a comment.